라즈베리파이 4B 4gb에 PiOS가 설치된 환경에서 MagicMirror를 설치한 후 사진과 영상을 모두 백그라운드에서 슬라이드쇼할 수 있는 모듈 설치하는 것 까지 정리한 후기다.
Magic Mirror 공식 3rd Party Modules (링크)에 사진과 영상을 동시에 슬라이드쇼로 노출하는 모듈은 없어서 Chat-GPT와 함께 시행착오 겪으면서 완성했다. 따라서 아래에 설명되는 모듈은 Magic Mirror 깃헙에는 없다.
Contents
매직미러(Magic Mirror) 설치 배경
이미 몇년전부터 전자앨범을 DIY로 제작하여 활용 중이었고, Dak Board와 Magic Mirror 모두 운영해보았지만, 최근 1년동안은 화면이 꺼진채로 방치되었다.


아이들 어릴적 사진들만 몇년동안 디스플레이하다가 멈추게된 건데, 이제 아이들이 초등학교 고학년이 된 만큼 새단장을 하고 싶더라. 최근 사진들로 말이다.
그리고 Dak Board 와 Magic Mirror 장단점이라고 해야 하나?
활용도에 따라 다를텐데, 전자앨범의 기본-사진 슬라이드쇼만 되어도 충분하다면 Dak Board 가 편하다. 다양한 기능이나 정보를 출력하겠다는 목적이 있다면 Magic Mirror로 가야겠지만, 손재주가 좀 있어야 하겠지.
어쨌든 Dak Board, Magic Mirror 모두 Google Photo API가 보안문제로 막히는 바람에 평소 Google Photo와 연동해서 사용했던 나는 다른 방법을 찾아야 했고, Dak Board를 활용한 우회 방법보다는 (관리의 어려움과 귀찮음이 있겠지만) 자유도가 높은 Magic Mirror를 선택했다.
라즈베리파이 PiOS 설치
라즈베리파이 4B에 PiOS를 설치한 환경이다. 2025년 9월 기준 업데이트된 버전으로 아래와 같으며, USB3 포트에 SSD 연결해서 OS를 설치했다.
jay@pi-display:~ $ cat /etc/*release*
PRETTY_NAME="Debian GNU/Linux 12 (bookworm)"
NAME="Debian GNU/Linux"
VERSION_ID="12"
VERSION="12 (bookworm)"
VERSION_CODENAME=bookworm
ID=debian
HOME_URL="https://www.debian.org/"
SUPPORT_URL="https://www.debian.org/support"
BUG_REPORT_URL="https://bugs.debian.org/"
eeprom 도 업데이트했다.
2년 전쯤에 eeprom을 업데이트한 적이 있는데, 무슨 버그인지, 부팅 이후 7~10일 정도에 어김없이 하드웨어가 다운되더라고. 이번 버전은 아직 7일 이상 테스트 해본 적은 없어서 더 두고봐야한다.
jay@pi-display:~ $ sudo rpi-eeprom-update
BOOTLOADER: up to date
   CURRENT: 2025. 05. 08. (목) 15:21:35 UTC (1746717695)
    LATEST: 2025. 05. 08. (목) 15:21:35 UTC (1746717695)
   RELEASE: default (/usr/lib/firmware/raspberrypi/bootloader-2711/default)
            Use raspi-config to change the release.

  VL805_FW: Dedicated VL805 EEPROM
     VL805: up to date
   CURRENT: 000138c0
    LATEST: 000138c0
Magic Mirror 설치
node.js 설치
가장 먼저 node.js를 설치해야한다. 이미 설치되어 있을 수도 있지만, 업데이트나 설치나 과정이 별반 차이가 없으니, 그냥 설치하는 것으로 한다.
https://nodesource.com/products/distributions 에 설치 명령어가 있다.
보통 curl은 이미 설치되어 있을테지만, 아닌경우도 많으니 순서대로 진행하면 되며, 마지막 node -v 는 버전확인 명령어다.
sudo apt-get install -y curl
curl -fsSL https://deb.nodesource.com/setup_22.x | sudo -E bash -
sudo apt-get install -y nodejs
node -v
Magic Mirror 다운로드 및 설치
역시 공식 페이지에 잘 설명되어 있다. 아래 URL 의 가이드대로 진행하면된다.
https://docs.magicmirror.builders/getting-started/installation.html#manual-installation
그리고 config.js 파일을 복사하는 단계가 있는데, 최초 설치 시 config 디렉토리에 config.js.sample 파일만 있는데, 이를 복사해서 config.js로 붙혀넣는다. 기존 sample 파일은 백업본으로 유지하면 된다.
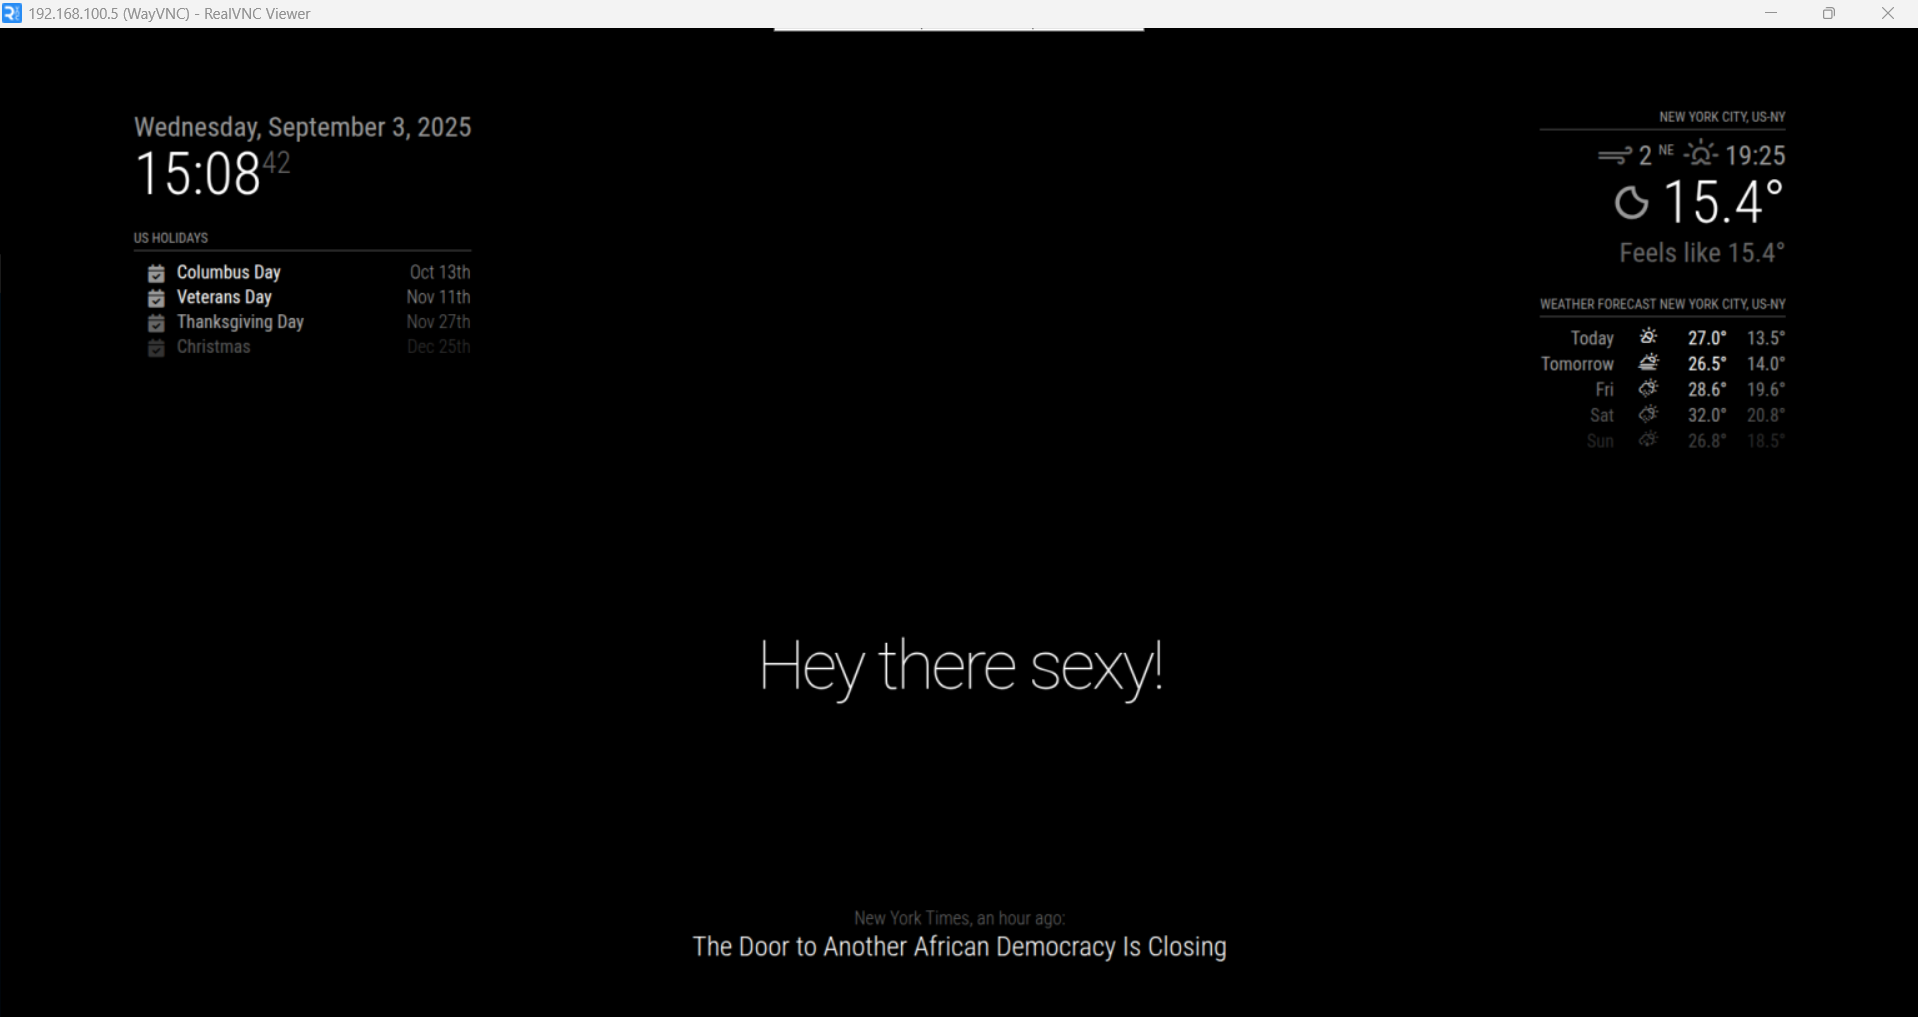
실행하면 config.js의 default 설정 그대로 MagicMirror 화면이 뜬다.

여기까지 작업하면 Magic Mirror는 설치된 샘이다.
다만, 전자앨범 역할 중 가장 중요한 백그라운드에서의 슬라이드쇼를 해결해야하는데, 보통은 Magic Mirror 공식 Github에서 리스팅하는 3rd Party Modules을 활용해도 되지만, 내가 원하는 Module이 없다.
프로세스 관리를 위해 pm2 설치 및 Magic Mirror 등록하기
https://docs.magicmirror.builders/getting-started/installation.html#manual-installation 가이드를 살펴보면 Magic Mirror를 시작하는 방법은 다양하지만 pm2로 관리하는 것이 편하다. 데몬가 프론트에서 시작되면 다른 관리를 할 수 없지만, pm2로 백그라운드 실행되면 로그확인, 파일수정, 재실행/정지 등 관리가 편하다.
PM2 설치하기
sudo npm install -g pm2
pm2 -v
실행환경 파일 만들기
home/jay 디렉토리에서 nano로 작성/저장했다. 해당 디렉토리가 부팅시 default 위치이므로 가장 편하다.
module.exports = {
  apps: [{
    name: "mm",
    cwd: "/home/jay/MagicMirror",
    script: "npm",
    args: "start",
    env: {
      DISPLAY: ":0" //실제 echo $DISPLAY로 확인한 값 넣기 (:0 또는 :1)
    }
  }]
};
PM2로 환경모듈 시작하기
pm2 start ~/mm-ecosystem.config.js재부팅시 자동 실행 설정하기
pm2 save #현재 프로세스 상태 저장 (위에서 pm2 start 가 된 상태에서 저장해야 함)
pm2 startup systemd
# 위에서 출력되는 안내문에 따라 sudo로 한 줄 더 실행 (예: sudo env PATH=... pm2 startup ...)
pm2 save
아래와 같이 진행되니 참고하자. 재부팅하면 백그라운드에서 Magic Mirror가 실행된다.
jay@pi-display:~ $ pm2 start mm-ecosystem.config.js
[PM2][WARN] Applications mm not running, starting...
[PM2] App [mm] launched (1 instances)
┌────┬────────────────────┬──────────┬──────┬───────────┬──────────┬──────────┐
│ id │ name               │ mode     │ ↺    │ status    │ cpu      │ memory   │
├────┼────────────────────┼──────────┼──────┼───────────┼──────────┼──────────┤
│ 0  │ mm                 │ fork     │ 0    │ online    │ 0%       │ 35.8mb   │
└────┴────────────────────┴──────────┴──────┴───────────┴──────────┴──────────┘
jay@pi-display:~ $ pm2 save
[PM2] Saving current process list...
[PM2] Successfully saved in /home/jay/.pm2/dump.pm2
jay@pi-display:~ $ pm2 startup systemd
[PM2] Init System found: systemd
[PM2] To setup the Startup Script, copy/paste the following command:
sudo env PATH=$PATH:/usr/bin /usr/lib/node_modules/pm2/bin/pm2 startup systemd -u jay --hp /home/jay
jay@pi-display:~ $ sudo env PATH=$PATH:/usr/bin /usr/lib/node_modules/pm2/bin/pm2 startup systemd -u jay --hp /home/jay

                        -------------

__/\\\\\\\\\\\\\____/\\\\____________/\\\\____/\\\\\\\\\_____
 _\/\\\/////////\\\_\/\\\\\\________/\\\\\\__/\\\///////\\\___
  _\/\\\_______\/\\\_\/\\\//\\\____/\\\//\\\_\///______\//\\\__
   _\/\\\\\\\\\\\\\/__\/\\\\///\\\/\\\/_\/\\\___________/\\\/___
    _\/\\\/////////____\/\\\__\///\\\/___\/\\\________/\\\//_____
     _\/\\\_____________\/\\\____\///_____\/\\\_____/\\\//________
      _\/\\\_____________\/\\\_____________\/\\\___/\\\/___________
       _\/\\\_____________\/\\\_____________\/\\\__/\\\\\\\\\\\\\\\_
        _\///______________\///______________\///__\///////////////__


                          Runtime Edition

        PM2 is a Production Process Manager for Node.js applications
                     with a built-in Load Balancer.

                Start and Daemonize any application:
                $ pm2 start app.js

                Load Balance 4 instances of api.js:
                $ pm2 start api.js -i 4

                Monitor in production:
                $ pm2 monitor

                Make pm2 auto-boot at server restart:
                $ pm2 startup

                To go further checkout:
                http://pm2.io/


                        -------------

[PM2] Init System found: systemd
Platform systemd
Template
[Unit]
Description=PM2 process manager
Documentation=https://pm2.keymetrics.io/
After=network.target

[Service]
Type=forking
User=jay
LimitNOFILE=infinity
LimitNPROC=infinity
LimitCORE=infinity
Environment=PATH=/usr/local/sbin:/usr/local/bin:/usr/sbin:/usr/bin:/sbin:/bin:/usr/local/games:/usr/games:/usr/bin:/bin:/usr/local/sbin:/usr/local/bin:/usr/sbin:/usr/bin
Environment=PM2_HOME=/home/jay/.pm2
PIDFile=/home/jay/.pm2/pm2.pid
Restart=on-failure

ExecStart=/usr/lib/node_modules/pm2/bin/pm2 resurrect
ExecReload=/usr/lib/node_modules/pm2/bin/pm2 reload all
ExecStop=/usr/lib/node_modules/pm2/bin/pm2 kill

[Install]
WantedBy=multi-user.target

Target path
/etc/systemd/system/pm2-jay.service
Command list
[ 'systemctl enable pm2-jay' ]
[PM2] Writing init configuration in /etc/systemd/system/pm2-jay.service
[PM2] Making script booting at startup...
[PM2] [-] Executing: systemctl enable pm2-jay...
Created symlink /etc/systemd/system/multi-user.target.wants/pm2-jay.service → /etc/systemd/system/pm2-jay.service.
[PM2] [v] Command successfully executed.
+---------------------------------------+
[PM2] Freeze a process list on reboot via:
$ pm2 save

[PM2] Remove init script via:
$ pm2 unstartup systemd
jay@pi-display:~ $ pm2 save
[PM2] Saving current process list...
[PM2] Successfully saved in /home/jay/.pm2/dump.pm2
자주 사용하는 pm2 명령어
pm2 status              # 상태표
pm2 logs mm             # 실시간 로그
pm2 logs mm --lines 200 # 최근 200줄
pm2 stop mm             # 중지
pm2 restart mm          # 재시작
pm2 delete mm           # 등록 해제
pm2 flush               # 로그 파일 비우기
# 로그 파일 경로: ~/.pm2/logs/mm-out.log, ~/.pm2/logs/mm-error.log
MMM-MediaBackground 모듈 제작
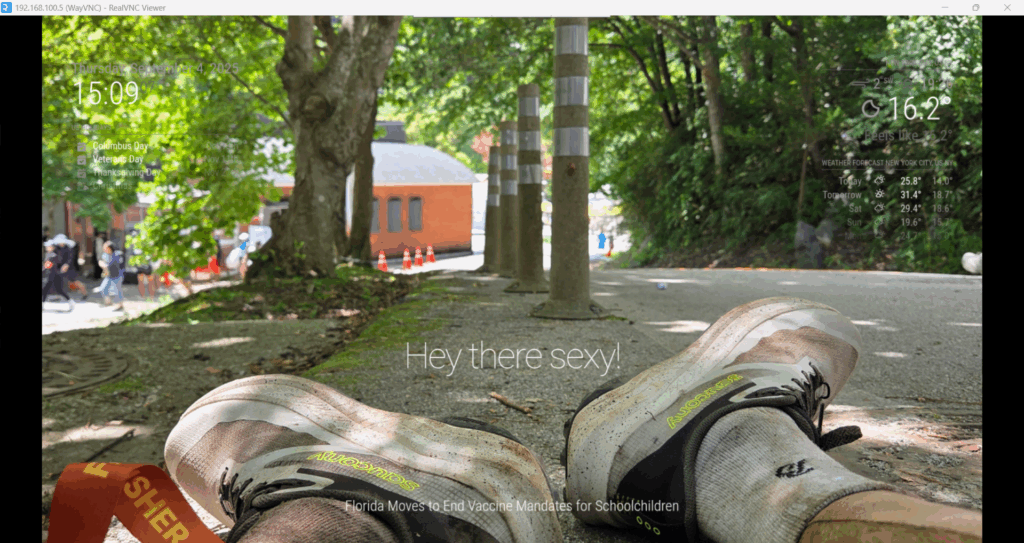
이미 언급한대로 3rd Party Modules에는 이미지 슬라이드 쇼 모듈은 있지만, 이미지와 영상을 함께 슬라이드쇼할 수 있는 모듈은 없다. 그래서 Chat-GPT와 함께 제작을 했는데, 우여곡절이 있었지만 결국 잘 구현되었다.
디렉토리 구조
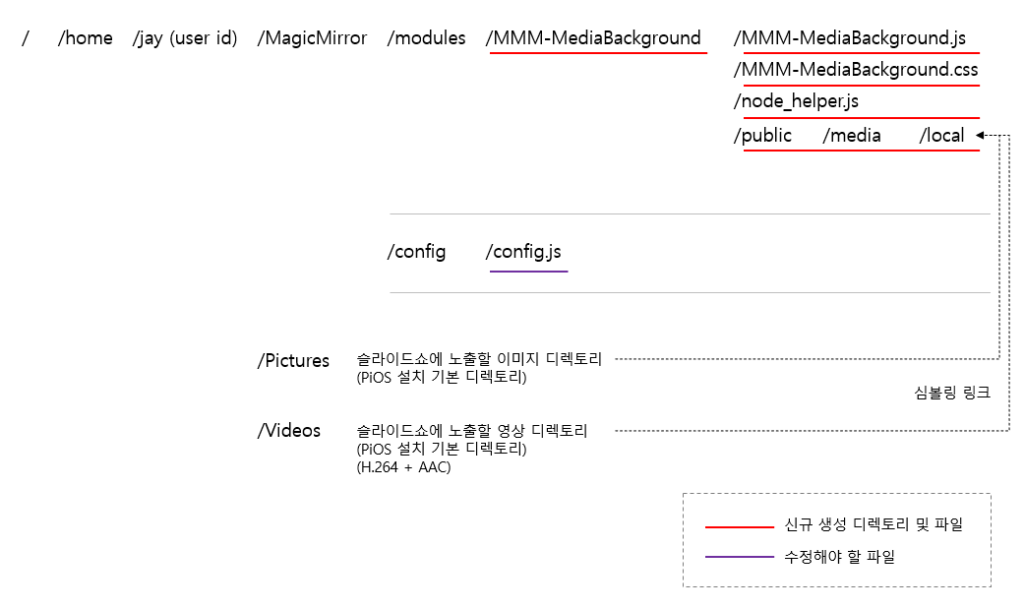
구조를 설명하기 위한 그림인데, 설명을 위해 필요한 디렉토리와 파일만 정리한 것이다.
MMM-MediaBackground 모듈을 구현하기 위해 신규 디렉토리와 파일을 만들고, config.js를 약간 수정하면 완성이다. 아주 간단하다.
MMM-MediaBackground 모듈
위 구조에서 신규로 생성해야 할 디렉토리를 만들고, 아래 3개 파일을 작성/저장하면 된다.
나는 주로 nano를 사용한다.
MMM-MediaBackground.js
/* MMM-MediaBackground : Background slideshow with mixed images + videos */
Module.register("MMM-MediaBackground", {
  defaults: {
    mediaPaths: ["/home/jay/Pictures", "/home/jay/Videos"],
    extensions: ["jpg","jpeg","png","gif","webp","mp4","webm","mov","m4v"],
    recursive: true,
    randomize: true,
    slideInterval: 15000,
    fadeSpeed: 800,
    video: { mute: true, loop: false, maxDurationMs: 60000 },
    zIndex: -1,
    useFileProtocol: true // Electron 로컬 화면 기본(=file://). 원격 브라우저도 쓸 거면 false로.
  },

  start() {
    this.mediaList = [];
    this.index = 0;
    this.wrapper = null;
    this.timer = null;
    this.loaded = false;
    this.sendSocketNotification("SCAN_MEDIA", {
      mediaPaths: this.config.mediaPaths,
      extensions: this.config.extensions,
      recursive: this.config.recursive,
      randomize: this.config.randomize,
      useFileProtocol: this.config.useFileProtocol
    });
jhdsgfkjhsdfjksdhgfjkhsdgfkjshdgkfjhsdg
// 🔎 임시 하드코딩(문제 원인 단박 확인용) — 테스트 후 반드시 지워도 됨
// setTimeout(() => {
//   const test = document.createElement("img");
//   test.className = "MMB-fit MMB-media";
//   test.src = "file:///home/jay/Pictures/test.png";
//   document.body.appendChild(test);
// }, 2000);

  },

  getStyles() { return [this.file("MMM-MediaBackground.css")]; },

  getDom() {
    const w = document.createElement("div");
    w.className = "MMB-wrapper";
    w.style.zIndex = this.config.zIndex;
    this.wrapper = w;
    if (!this.loaded) {
      const msg = document.createElement("div");
      msg.className = "MMB-loading";
      msg.innerText = "Loading media…";
      w.appendChild(msg);
    }
    return w;
  },

  socketNotificationReceived(n, payload) {
    if (n === "MEDIA_LIST") {
      this.mediaList = payload || [];
      this.loaded = true;
      this.updateDom();
      if (this.mediaList.length > 0) this.showNext();
    }
  },

  suspend() { this._clearTimer(); },
  resume()  { if (this.loaded && this.mediaList.length > 0) this.showNext(); },

  _clearTimer() { if (this.timer) { clearTimeout(this.timer); this.timer = null; } },

  showNext() {
    this._clearTimer();
    if (!this.wrapper || this.mediaList.length === 0) return;

    const url = this.mediaList[this.index];
    this.index = (this.index + 1) % this.mediaList.length;

    const isVideo = this._isVideo(url);
    const el = isVideo ? this._createVideo(url) : this._createImage(url);

    el.classList.add("MMB-media");
    el.style.opacity = "0";
    this.wrapper.appendChild(el);

    // 이전 요소들 페이드아웃 후 제거
    const prev = Array.from(this.wrapper.querySelectorAll(".MMB-media")).slice(0, -1);
    prev.forEach(p => {
      p.style.transition = `opacity ${this.config.fadeSpeed}ms linear`;
      p.style.opacity = "0";
      setTimeout(() => p.remove(), this.config.fadeSpeed + 50);
    });

    requestAnimationFrame(() => {
      el.style.transition = `opacity ${this.config.fadeSpeed}ms linear`;
      el.style.opacity = "1";
    });

    if (isVideo) {
      let advanced = false;
      const goNext = () => { if (advanced) return; advanced = true; this.showNext(); };
      el.onended = () => goNext();
      this.timer = setTimeout(goNext, this.config.video.maxDurationMs);
    } else {
      this.timer = setTimeout(() => this.showNext(), this.config.slideInterval);
    }
  },

  _isVideo(u) {
    const ext = (u.split("?")[0].split(".").pop() || "").toLowerCase();
    return ["mp4","webm","mov","m4v"].includes(ext);
  },

  _createImage(src) {
    const img = document.createElement("img");
    img.src = src;
    img.draggable = false;
    img.className = "MMB-fit";
    img.loading = "eager";
    return img;
  },

  _createVideo(src) {
    const v = document.createElement("video");
    v.src = src;
    v.className = "MMB-fit";
    v.autoplay = true;
    v.muted = true;
    v.playsInline = true;
    v.loop = !!this.config.video.loop;
    v.controls = false;
    v.preload = "auto";
    v.setAttribute("webkit-playsinline", "true");
    v.setAttribute("x5-playsinline", "true");
    return v;
  }
});
MMM-MediaBackgroud.css
.MMB-wrapper { position: fixed; inset: 0; overflow: hidden; pointer-events: none; }
.MMB-loading { position: absolute; inset: 0; display: grid; place-items: center; font-size: 18px; color: #aaa; }
.MMB-media   { position: absolute; inset: 0; }
.MMB-fit     { width: 100%; height: 100%; object-fit: cover; object-position: center center; }
node_helper.js
// Node helper: MMM-MediaBackground (HTTP static serving version, no block comments)
const NodeHelper = require("node_helper");
const fs = require("fs");
const path = require("path");
const express = require("express");

module.exports = NodeHelper.create({
  start() {
    // Serve this module's ./public directory at /MMM-MediaBackground
    this.expressApp.use(
      "/MMM-MediaBackground",
      express.static(this.path + "/public")
    );
  },

  socketNotificationReceived(n, payload) {
    if (n !== "SCAN_MEDIA") return;

    const {
      mediaPaths = [],
      extensions = [],
      recursive = true,
      randomize = true
    } = payload;

    const allow = new Set(extensions.map(e => String(e).toLowerCase()));

    // Scan folders
    let results = [];
    for (const p of mediaPaths) {
      results = results.concat(this.scan(p, allow, recursive));
    }

    // Dedupe + optional shuffle
    results = Array.from(new Set(results));
    if (randomize) this.shuffle(results);

    // Map absolute paths -> HTTP URLs under this module
    // Example: /home/jay/Pictures/xxx -> /MMM-MediaBackground/media/local/Pictures/xxx
    this.ensureSymlink("/home/jay", this.path + "/public/media/local");
    const urls = results.map(p =>
      p.replace(/^\/home\/jay\//, "/MMM-MediaBackground/media/local/")
    );

    // Debug logs (check with `pm2 logs mm`)
    console.log("[MMM-MediaBackground] files:", results.length);
    if (results[0]) {
      console.log("[MMM-MediaBackground] first path:", results[0]);
      console.log("[MMM-MediaBackground] first URL :", urls[0]);
    }

    this.sendSocketNotification("MEDIA_LIST", urls);
  },

  // Recursive scan for allowed extensions
  scan(root, allow, recursive) {
    let out = [];
    try {
      const stat = fs.statSync(root);
      if (!stat.isDirectory()) return out;

      const items = fs.readdirSync(root);
      for (const it of items) {
        const full = path.join(root, it);
        try {
          const s = fs.statSync(full);
          if (s.isDirectory()) {
            if (recursive) out = out.concat(this.scan(full, allow, recursive));
          } else if (s.isFile()) {
            const ext = (it.split(".").pop() || "").toLowerCase();
            if (allow.has(ext)) out.push(full);
          }
        } catch (_) {}
      }
    } catch (_) {}
    return out;
  },

  // Ensure symlink: /home/jay  ->  modules/MMM-MediaBackground/public/media/local
  ensureSymlink(srcDir, dst) {
    try {
      const parent = path.dirname(dst);
      if (!fs.existsSync(parent)) fs.mkdirSync(parent, { recursive: true });
      if (fs.existsSync(dst)) return;
      fs.symlinkSync(srcDir, dst, "dir");
    } catch (e) {
      console.log("[MMM-MediaBackground] symlink error:", e && e.message);
    }
  },

  shuffle(arr) {
    for (let i = arr.length - 1; i > 0; i--) {
      const j = Math.floor(Math.random() * (i + 1));
      [arr[i], arr[j]] = [arr[j], arr[i]];
    }
  }
});
디렉토리 생성/심볼릭 링크와 권한설정
기본적으로 Module은 Module 디렉토리에 안에서 운영되므로 Module 디렉토리 밖의 파일을 불러오기 위해서 아래와 같이 Pictures, Videos 디렉토리의 권한을 설정하고, 해당 파일들은 module 디렉토리에 MMM-MediaBackground에서 원활하게 읽을 수 있도록 심볼릭 링크로 이어주는 작업을 해야 한다. (물론 다른 방법도 있을텐데, Chat-GPT와 계속된 오류를 잡으면서 도달한 방법이 이러했다.)
cd ~/MagicMirror/modules/MMM-MediaBackground
mkdir -p public/media
rm -f public/media/local
ln -s /home/jay public/media/local
ls -l public/media    # local -> /home/jay 가 보여야 정상
sudo chown -R jay:jay /home/jay/Pictures /home/jay/Videos
chmod -R a+r /home/jay/Pictures /home/jay/Videos
find /home/jay/Pictures -type d -exec chmod a+rx {} \;
find /home/jay/Videos -type d -exec chmod a+rx {} \;config.js에 모듈 추가
                {
  			module: "MMM-MediaBackground",
			position: "fullscreen_below", // 또는 "fullscreen_above" (필요에 따라 조정)
			config: {
			        mediaPaths: ["/home/jay/Pictures", "/home/jay/Videos"],
 				extensions: ["jpg","jpeg","png","webp","mp4","webm","mov"],
				recursive: true,
				randomize: true,
			        slideInterval: 15000,
			        fadeSpeed: 800,
				video: { mute: true, loop: false, maxDurationMs: 60000 },
				zIndex: 0,
				useFileProtocol: false
			}
		},
config.js 에는 default 모듈들이 여럿있는데, 맨 아래에 추가하면 된다.
처음 접하면 어려울 수 있으니, 파일로 첨부해 놓자. (config.js, MMM-MediaBackground.js, MMM-MediaBackground.css, node_helper.js 모두 압축해서 업로드했으며, config.js는 default에서 모듈만 추가했음)
마무리 설정하기 및 참고사항
모든 것들이 잘 실행되지만, 몇가지 추가로 설정해야 할 부분들이 있다.
로컬 SSD가 아닌 NAS 로 변경한다면?
어차피 구글 포토에서 다운로드 받은 이미지와 영상 파일을 활용하는 것이 가장 편할 것 같아서 SSD를 그래도 사용하고, FTP 혹은 SMB로 파일 관리할 생각이다.
다만, 혹시라도 NAS를 활용하게 될지도 모르지 미리 Chat-GPT의 1차 답변을 링크한다.
참고: 테스트 중에 이미지/영상 파일 업로드는 ssh 접속 툴로 사용중인 MobaXterm을 통해서 업로드함.
영상 파일 포멧/코덱 변환하기
구글 포토에서 영상을 다운로드 받으면 HEVC(H.265) / VP9 / HDR / VFR 같은 형식일 수 있는데, 크로미움에서는 재생이 안되고 검정화면만 보일 수 있다. ffmpeg를 이용해서 H.264 + AAC, 1080p 코덱/포멧으로 변경하자.
ffmpeg 설치 및 코덱확인
sudo apt update
sudo apt install ffmpeg -y

ffprobe -v error -select_streams v:0 \
  -show_entries stream=codec_name,profile,pix_fmt,width,height,avg_frame_rate \
  -of default=nokey=1:noprint_wrappers=1 "/home/jay/Videos/테스트영상.mp4"
변환하기 (단일 파일)
ffmpeg -y -i "/home/jay/Videos/테스트영상.mp4" \
  -vf "scale='min(1920,iw)':-2,fps=30" \
  -c:v libx264 -pix_fmt yuv420p -profile:v high -level 4.1 -preset veryfast -crf 23 \
  -c:a aac -b:a 128k -movflags +faststart \
"/home/jay/Videos/테스트영상_h264.mp4"- scale=’min(1920,iw)’:-2 → 1920 너비 이상이면 1080p로 맞춤
- fps=30 → VFR(가변 프레임) → CFR(30fps 고정)으로 변환
- libx264 -crf 23 → 품질 23(낮을수록 화질↑ 용량↑, 보통 18~28)
- -movflags +faststart → 웹/스트리밍에서 바로 재생되게
변환하기 (디렉토리 내 파일 일괄)
for f in /home/jay/Videos/*.mp4; do
  [ -f "$f" ] || continue
  ffmpeg -y -i "$f" \
    -vf "scale='min(1920,iw)':-2,fps=30" \
    -c:v libx264 -pix_fmt yuv420p -profile:v high -level 4.1 -preset veryfast -crf 23 \
    -c:a aac -b:a 128k -movflags +faststart \
    "${f%.*}_h264.mp4"
done
그리고 추가로 변환속도 조절을 위해 참고해놓자. 실제로 라즈베리파이에서 변환하기 시간이 많이 걸리더라고. 화질을 조금 낮추고 속도를 올리는게 이득이다.
- -preset veryfast를 ultrafast로 바꾸면 속도↑, 용량 조금 더 커집니다.
- 720p까지만 쓰려면 scale=’min(1280,iw)’:-2 로 바꾸면 더 가볍습니다.
슬라이드쇼 인터벌 조정하기
config.js 파일의 slideInterval, fadeSpeed, maxDurationMs 을 조정하면 된다.
직결된 모니터 세로 출력으로 변경하기
전자액자 실물은 세로형으로 벽에 걸려있어서 PiOS화면 출력도 세로로 변경해야 한다.
요즘은 Desktop 화면 시작 메뉴에 Screen Configuration 메뉴가 있어서 UI에서 직접 설정도 가능해서 파일을 굳이 건드릴 필요는 없다.
답글 남기기